How to Start Streaming on Twitch: A Beginner Setup Checklist
What you need, what can wait, the OBS settings to start with, the four scenes every stream needs, and the current Twitch Affiliate criteria — in the order that actually matters.

To start streaming on Twitch you need four things: a Twitch account, a computer or console that can run the game and the stream at the same time, a decent microphone, and a free broadcasting app such as OBS Studio. Everything else — camera, overlay, alerts, panels — makes the stream better, but none of it is required for your first broadcast. This checklist walks through the setup in the order that actually matters.
What you need, and what can wait
| Required | Twitch account · PC or console · microphone · OBS Studio (free) · stable upload connection |
| Strongly recommended | Wired Ethernet instead of Wi-Fi · headphones, so game audio does not leak into the mic · a Starting Soon screen |
| Nice to have | Webcam or VTuber model · overlay · alerts · channel panels · Discord server |
| Can wait | Capture card for consoles you can stream natively from · stream deck · second monitor · dedicated streaming PC |
The order is deliberate. Viewers forgive a plain screen far more readily than they forgive bad audio or a stream that keeps dropping frames. Fix sound and stability first; decoration second.
Step 1: Check your upload speed
Run a speed test and look at the upload figure, not download. A useful rule: keep your stream bitrate at or below about 75% of your stable upload speed. A 6,000 kbps stream needs roughly 8 Mbps of reliable upload; a 4,500 kbps stream needs about 6 Mbps.
If your upload is low or jumps around, stream at 720p. A clean 720p stream looks better than a 1080p stream that stutters.
Step 2: Install OBS and use these starting settings
OBS Studio is free, works on Windows, macOS and Linux, and connects to Twitch directly from Settings → Stream. Connect your account there rather than pasting a stream key by hand. Then use this as a starting point:
| Setting | 1080p60 | 720p60 |
| Output resolution | 1920 × 1080 | 1280 × 720 |
| Frame rate | 60 | 60 (or 30 for slow games) |
| Bitrate (CBR) | 6,000 kbps | 3,500–4,500 kbps |
| Keyframe interval | 2 seconds | 2 seconds |
| Encoder | Hardware encoder (NVENC, AMD or Apple) if you have one; otherwise x264 on the veryfast preset | |
6,000 kbps is Twitch's long-standing recommendation for standard 1080p60. Twitch's Enhanced Broadcasting, built into recent OBS versions, can go higher and sends several quality versions from your own PC — useful later, but not needed on day one. Twitch requires the 2-second keyframe interval, so set it even if you change nothing else.
Keep the base (canvas) resolution at 1920 × 1080 even if you output 720p — overlays are built for that canvas and scale down cleanly. Our overlay size guide explains why.
Step 3: Get the audio right before anything else
- Mic level: talk at your normal volume and watch the OBS mixer. Your voice should sit in the yellow, peaking just below red.
- Game level: lower than your voice. Viewers came for you; the game is the background.
- Filters: right-click the mic in the mixer → Filters. Add Noise Suppression, then a Noise Gate if keyboard noise still comes through.
- Headphones: speakers feed game audio back into the mic and create an echo you will not hear but your viewers will.
Record ten minutes locally (Start Recording, not Start Streaming) and listen back. This single test catches most beginner problems.
Step 4: Build four scenes
A scene is a saved layout in OBS. You need four to look organised:
- Starting Soon — shown for the first few minutes while people arrive. Nobody joins at the exact start time.
- Main — game capture, mic, camera or model, overlay, chat.
- Be Right Back — for breaks, so you do not end the stream and lose viewers.
- Ending — a few seconds to thank people and point them to your next stream.
Our guide to Starting Soon, BRB and Ending screens covers what each one should say. If you want a smooth cut between them, add a stinger transition.
 Stream ScreensCozy Cats Animated Stream Screens for Twitch
$9.99
 Stream WidgetNeon Stream Screens Widget
$14.99
 Stream ScreensFantasy Tavern Animated Stream Screens for Twitch
$9.99
Step 5: Add an overlay, alerts and chat
These three are what make a stream feel live rather than recorded:
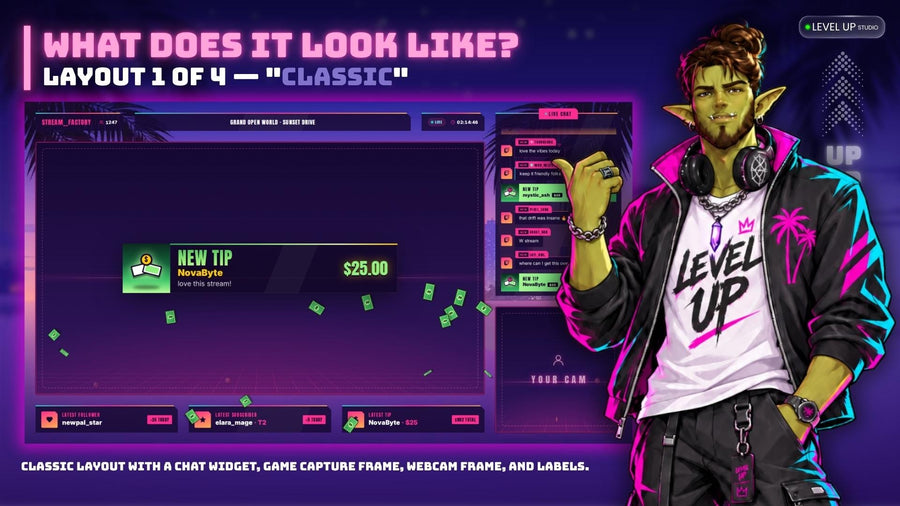
- Overlay — frames for your camera and gameplay, plus labels for your latest follower or sub. Most modern overlays install as a browser source; our OBS browser source guide shows the exact steps.
- Alerts — the animation that plays when someone follows, subs or tips. It is the moment a viewer sees their action acknowledged. Set them up with this guide.
- Chat on screen — essential if you upload VODs or clips, because the conversation is otherwise lost. See how to put Twitch chat on stream.
Buy or build these as one set if you can. An overlay, alerts and screens that share one palette look finished; three styles from three places look accidental. We explain the whole chain in how to build a stream setup that looks like one design.
Worried an animated overlay will cost you frames? It usually costs less than you think — here is what browser sources actually use.
Step 6: Finish the channel page
People who find you while you are offline see your channel page, not your stream. Before you go live, fill in:
- Profile picture and banner
- A short bio: what you stream and when
- Five to eight panels — About, Schedule, Rules, Discord, Socials, Support (sizes and what to put in them)
- An offline screen
The full walkthrough is in setting up your Twitch channel page.
Step 7: Your first-stream checklist
- Stream title written — specific, not "first stream!!"
- Category and tags set
- Test recording listened to
- Starting Soon scene active when you press Start Streaming
- Phone on silent, notifications off on the PC
- Chat open on a second screen or a browser window you can see
- Stats panel open in OBS (View → Stats) to watch for dropped frames
- An ending planned: thank people, say when you stream next
Twitch Affiliate: what it takes
Affiliate is the first monetisation tier on Twitch. The current criteria, all measured over a rolling 30-day window, are:
| Followers | 25 |
| Time streamed | 4 hours |
| Broadcast days | 4 different days |
| Viewers | 3 concurrent viewers on those days |
There is no application — Twitch sends the invitation when you qualify. Twitch has changed these numbers before, so check Creator Dashboard → Achievements for the live figures on your own account.
The viewer requirement is the one that stalls most new channels. What moves it is consistency: the same days, the same times, posted as a schedule people can actually follow, and a Discord server where regulars hear when you go live.
FAQ
Do I need a webcam to stream on Twitch?
No. Many successful channels are voice-only or use a VTuber model. A camera helps people connect with you, but good audio matters more.
What is the best free streaming software?
OBS Studio. It is free, open source, has no watermark and is what most overlays and tutorials are built for. Streamlabs Desktop is built on OBS and also works.
What bitrate should I use for Twitch?
6,000 kbps for 1080p60, around 3,500–4,500 kbps for 720p60, with a 2-second keyframe interval. Never set bitrate above about 75% of your upload speed.
Can I stream on Twitch from a console?
Yes — PlayStation and Xbox can stream directly, but for overlays, alerts and on-screen chat you need a capture card and OBS. Our console streaming guide covers the setup.
How long should my first stream be?
Two to three hours is a good target. Long enough for people to find you, short enough to keep your energy up — and it counts toward the 4 hours Affiliate requires.
Do I need an overlay to start?
No. You can go live with just a game and a mic. An overlay is worth adding once your audio and stability are solid, because it is what makes a new channel look intentional rather than improvised.